7.1 Recommended Spare Parts #
Below is a list of recommended spare parts that may require replacement during the course of system operation.
- Pressure Transducer
- ICWE Part # RC-TRAN-AV300
- Flow Switch
- ICWE Part # RC-FS-VK309
7.2 Spare Part Replacement #
NOTE – Running the Reclaim System in SYSTEM MANUAL mode immediately after repair can introduce a large amount of air into the filter system. The system should be run in SYSTEM AUTO mode after repairs.
7.2.1 Replacing Pressure Transducer #
- Turn 480VAC Main Disconnect switch on the front of the electrical enclosure to the OFF position.
- Ensure supply water is turned off.
- Remove the flathead screw from the back of the DIN cable connection on the sensor (Fig. 7.2.1 -1).
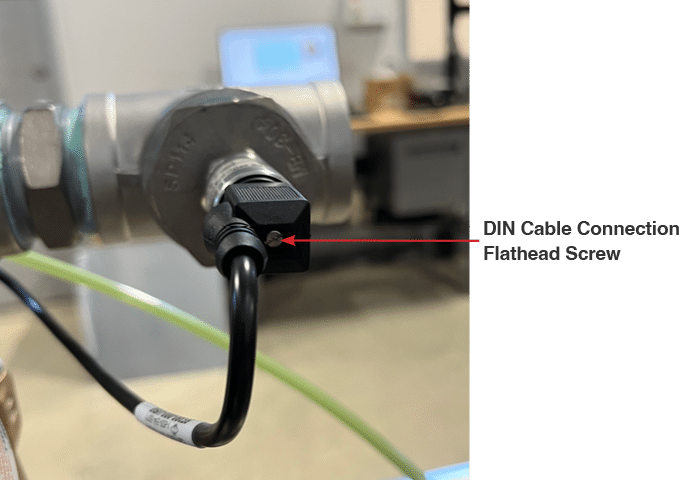
Fig. 7.2.1 – 1 – DIN cable connection screw
- Unscrew the existing pressure transducer.
- Apply stainless-rated Teflon thread tape to the new pressure transducer.
- Install the new sensor.
- Reconnect the DIN cable. The longest sensor pin on the pressure transducer lines up with the ground terminal on the DIN cable connection (Fig. 7.2.1 – 2)
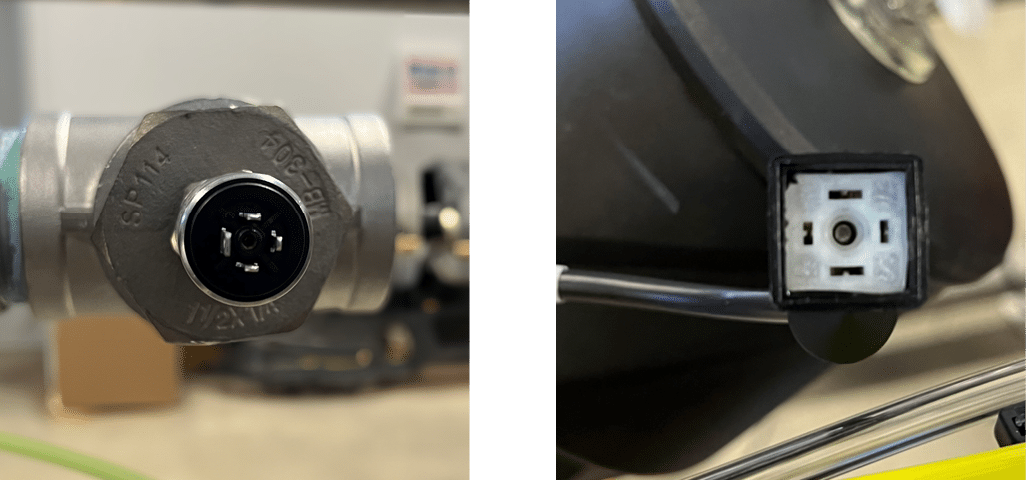
Fig. 7.2.1 – 2 – Pressure transducer (left) and DIN cable connection (right)
- Turn 480VAC Main Disconnect switch on the front of the electrical enclosure to the ON position.
- Slowly open your water supply line to allow water to flow back into the system.
- Navigate to the Overview screen on the HMI and press the SYSTEM AUTO button.
- Ensure the pressure is reading correctly on the HMI once the system is in Reclaim mode.
7.2.2 Replacing Flow Switch #
NOTE – Flow orientation is critical. Note the arrow on the back of the sensor for the direction of flow before installing the new sensor.
- Turn 480VAC Main Disconnect switch on the front of the electrical enclosure to the OFF position.
- Ensure supply water is turned off.
- Open the electrical enclosure.
- Remove the existing flow switch wire connections on terminals 101 and 1005 (Fig. 7.2 – 3).
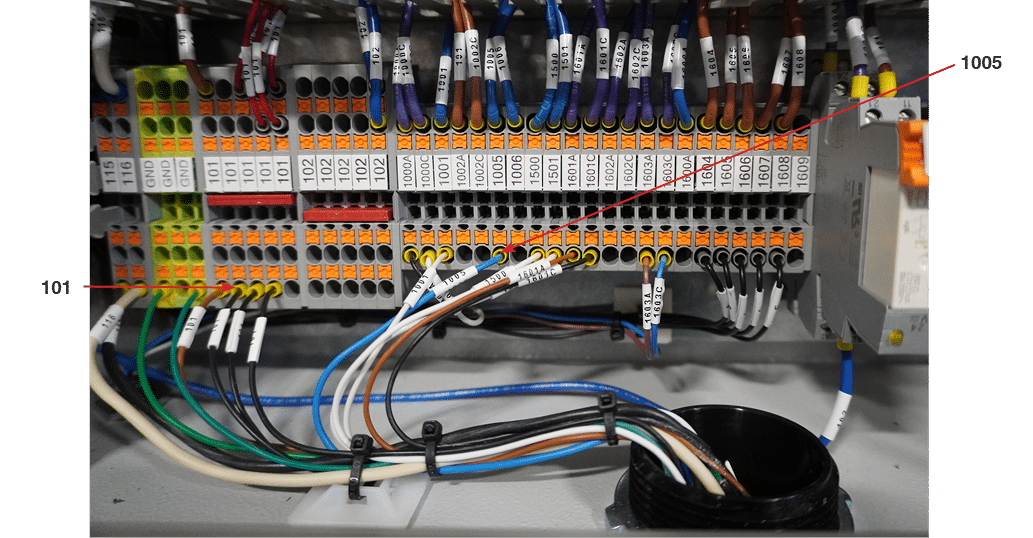
Fig. 7.2.2 – 1 – Flow switch wire connections
- Remove the sensor from the pipe on the Reclaim System
- Remove the sensor.
- Cut the paddle of the new sensor to the length of the existing sensor (Fig. 7.2.2 – 2).
- 30mm cut length for 2” diameter pipe at SEG discharge.
- 20mm cut length for 1.5” diameter pipe at To Sewer discharge.
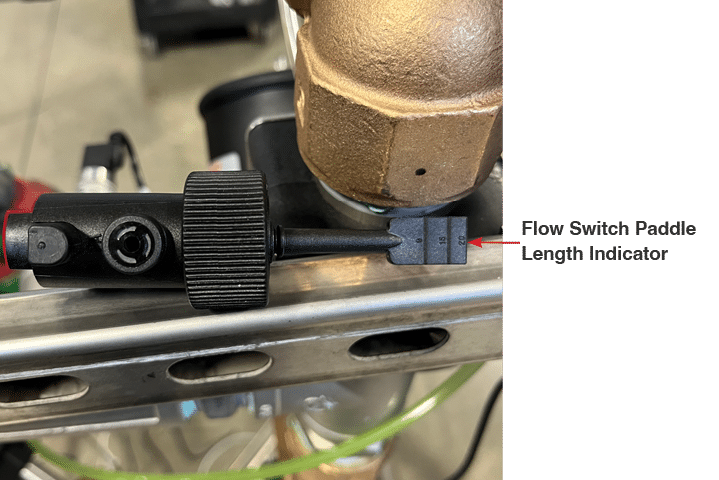
Fig. 7.2.2 – 2 – Flow switch and paddle length indicator
- Ensure the provided o-ring is in place and install the new sensor by hand tightening.
- Run wires into the electrical enclosure through the grommet on the bottom of the enclosure (Fig. 7.2.2 – 3).
- Connect the wires to terminals 101 and 1005 (Fig. 7.2.2 – 1).
- Turn 480VAC Main Disconnect switch on the front of the electrical enclosure to the ON position.
- Slowly open your water supply line to allow water to flow back into the system.
- Navigate to the Overview screen on the HMI and press the SYSTEM AUTO button.
- Ensure the pressure is reading correctly on the HMI once the system is in Reclaim mode.
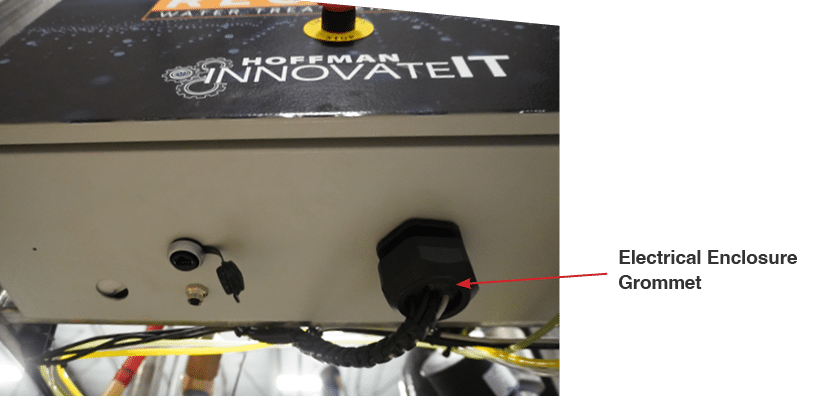
Fig. 7.2.2 – 3 – Electrical enclosure grommet location
